Cut through the noise. Forget zones, interfaces, and complexity. The security of your network—the digital fortress you defend—boils down to one thing: your list of security policies. You write the line between a secure and a vulnerable network right here. If you missed the last post, we went over a very basic Palo Alto configuration to get you up and running. You can read it here
We are forging the most important rule. This rule allows your legitimate traffic out to the internet and implicitly blocks everything else. Master this, and you master the firewall’s core.
A brand-new box means a fresh start. Jump into the UI and let’s make this thing work.
Prefer to see this in action? Watch the full walkthrough on our YouTube channel!
Step 1: Ditch the ACL Mindset
Perform a mental exorcism. Traditional firewalls taught you about Access Control Lists (ACLs). You know the drill: permit ip 192.168.1.0/24 any.
That old-school thinking leads to breaches. An ACL is a dumb bouncer checking an IP address. A Palo Alto Networks security policy is an intelligent gatekeeper asking, “Who are you, where are you going, and what are you trying to do?” Acknowledge this fundamental shift.
We no longer “allow port 443.” lets allow ssl. No longer “allow port 80.” We allow web-browsing. The magic of App-ID makes this possible and elevates us from network admins to security professionals.
Step 2: Forge the “Allow Outbound” Rule
Navigate to Policies > Security in the firewall UI. The magic happens here. Click Add to build the foundational rule. A new window with multiple tabs will appear. We will cover the essentials.
- General: Give the rule a descriptive name. Avoid generic names like
Rule 1. Name itPING-TO-OUTSIDEIt is simple, descriptive, and beautiful.

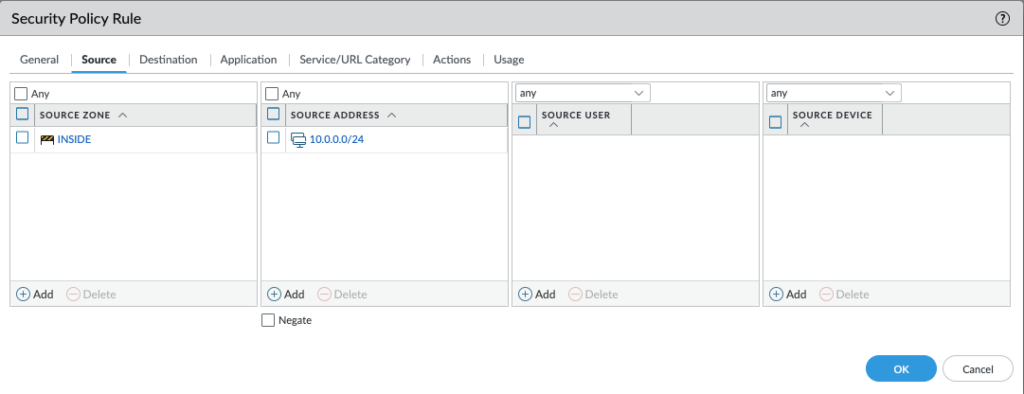
- Source: This defines the “who.” It specifies where traffic originates. Click Add and select your trusted internal zone, named
trustorlan. Source Address: You can leave this asany, but we are going to specify our inside subnet10.0.0.0/24. This setting means anyone inside thetrustzone. You can apply more granular controls later.
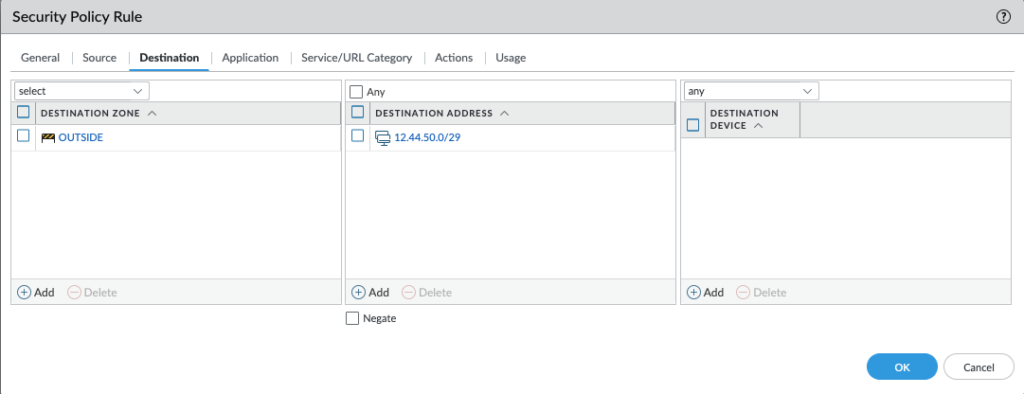
- Destination: This defines the “where.” It specifies where traffic is going. Add the
untrustzone (your internet-facing zone). Destination Address: Leave this asany. Your users need access to the entire internet. Here we are going to specify a specific subnet12.44.50.0/29
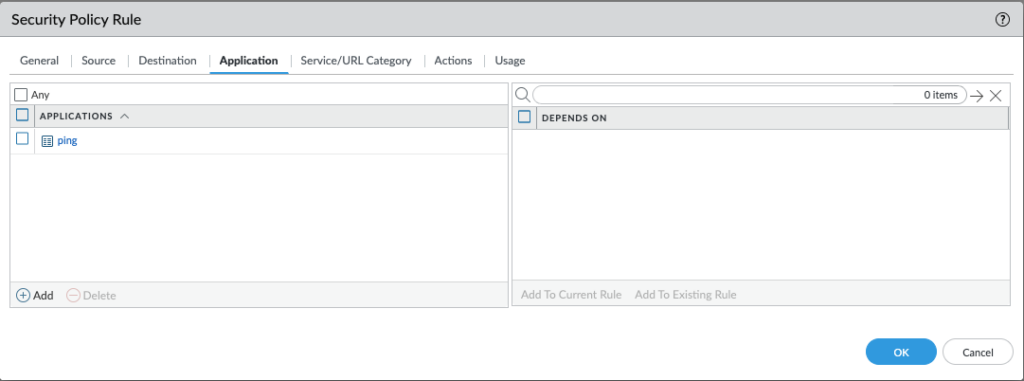
- Application: This is the secret sauce! Stop thinking in ports; start thinking in applications. Click Add and type to add the basics for user productivity:
sslweb-browsingdnspinggoogle-base(covers many Google services)ms-update(for necessary patches)
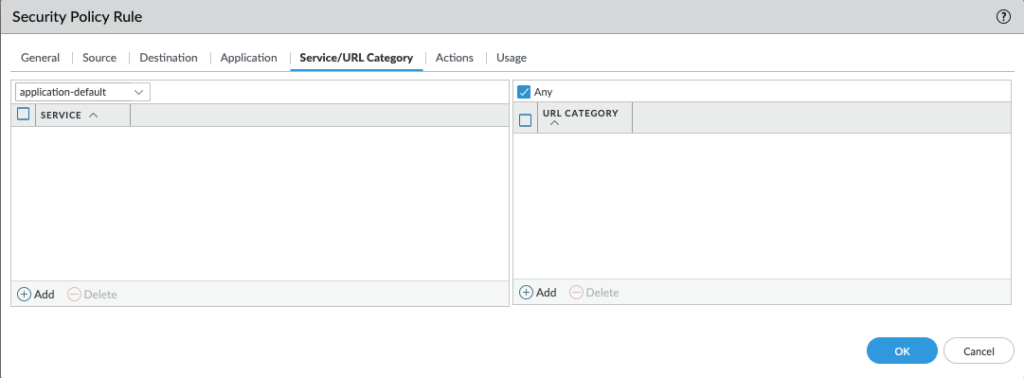
- Service/URL Category: Set this to
application-default. This setting is CRITICAL. It instructs the firewall to allow your defined applications only over their standard, expected ports. An application cannot run over a non-standard port. This is real security.
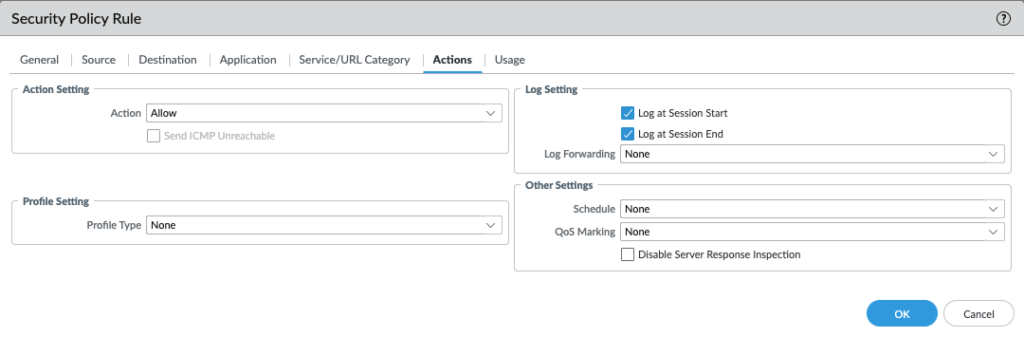
- Action: Set the dropdown to Allow. Log Setting: Check the Log at Session End box. You cannot secure traffic you cannot see. Log everything.
Click OK. The most important step is next: COMMIT YOUR CHANGES!
You Did It!
You successfully taught your digital bouncer to read the VIP list. Your firewall is no longer a big, dumb brute; it is a finely-tuned gatekeeper. Network traffic flows. The invisible, automatic deny any any rule at the bottom locks out the bad guys. Your users can get back to work.
This is just the beginning. The internet is a weird and wonderful place. The next threat is always around the corner.
Let’s Hear From the Pros!
I want to hear from other professionals. What is the most common mistake people make when writing their first outbound rule?
Drop your hard-earned wisdom in the comments or let me know over on my socials. Let’s make this a masterclass for everyone. Smash that subscribe button if this is the conversation you seek. This is what we do here!